I’ve been a fan of Derek Murphy for a few years now. He offers sound advice for writers and gives a huge amount to the writing community, much of it for free.
Recently he’s been running a free online writing course yet still found time to create a template for plotting and writing novels. He’s made the template available for free in various formats including Scrivener.
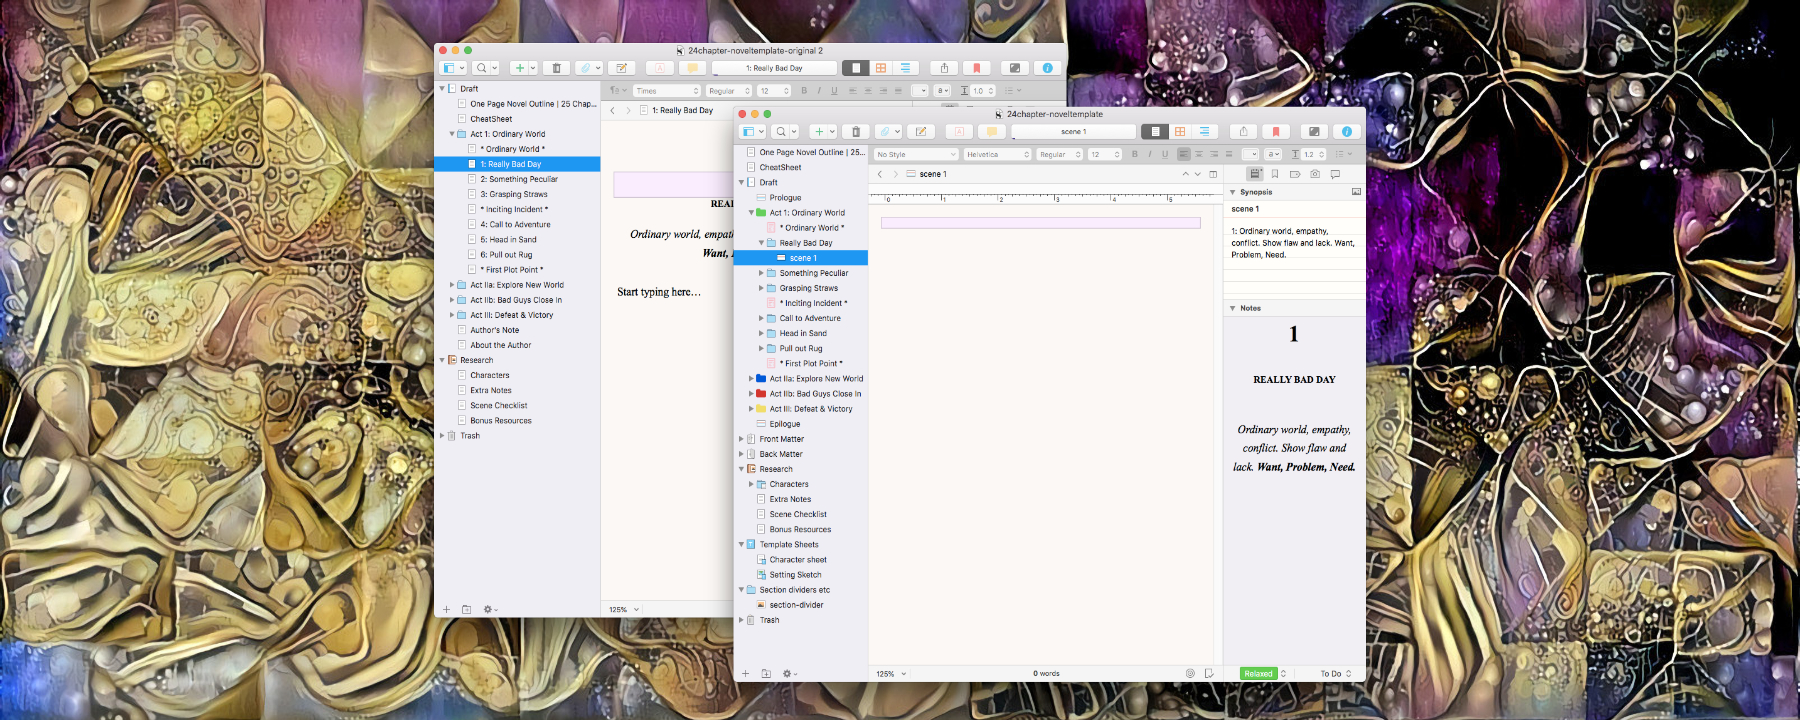
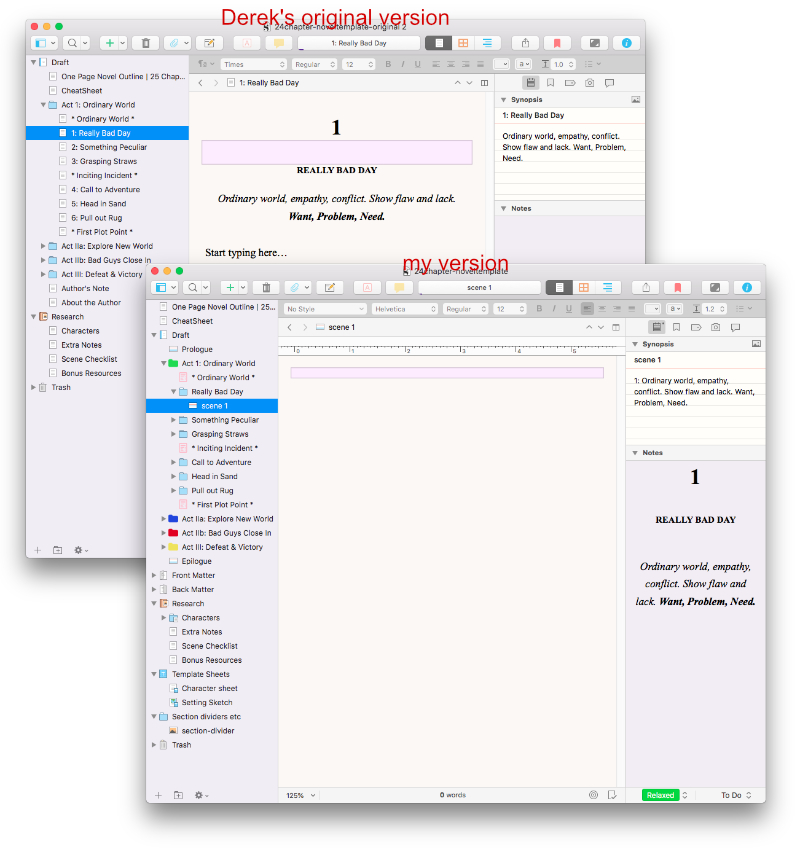
Derek’s original Scrivener template is fantastic resource and a wonderful aid to writers as it stands. All I’ve done is make a few modifications and added some extra bits to it, which I hope will make it even easier to use.
Please note my version will only work in Scrivener version 3 which, at the time of writing, is the latest version.
The download is a zip archive which contains two files:
- The 24 Chapter Scrivener template (24 Chapter Outline by Derek Murphy.scrivtemplate)
- An ebook3 format file (ebook3-with-extra-formatting.scrformat)
This is an extra – you don’t need it to use the template. If you choose to use it (see instructions later in this post) it can help you to compile a nicely formatted epub3 file.
How to import and use the Scrivener template
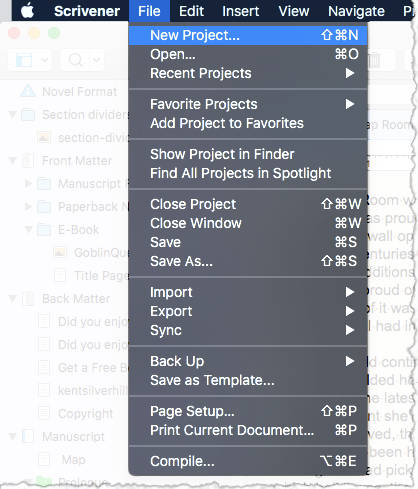
To import the template into Scrivener, select File=>New Project… from the menu.
A “Project Templates” dialog pops up. Whenever you create a new project, this is where you choose a template for your project. What we’re going to do is import the template you downloaded.
You can do this even if you don’t plan to start a new book just yet. Just follow the instructions to import the template, then cancel the “Project Templates” dialog.
Click the “Options” button at the bottom left of the dialog and select “Import Templates…”

Navigate to the folder where you downloaded the template 24 Chapter Outline by Derek Murphy.scrivtemplate and click the “Import” button.
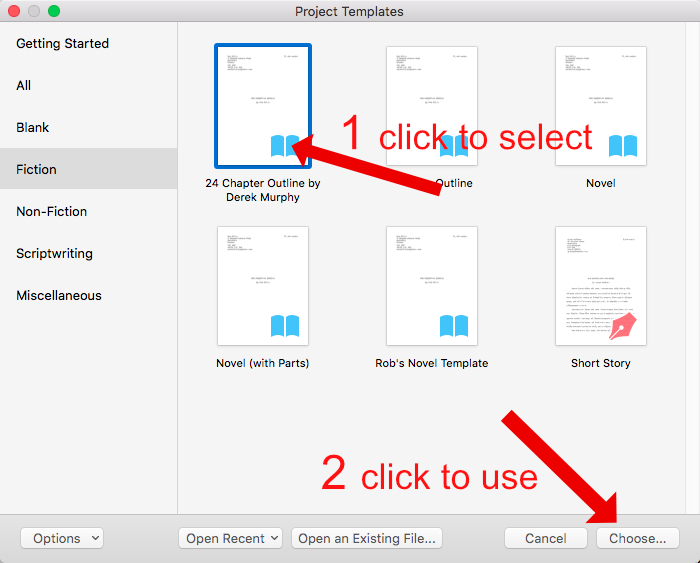
Now in the Project Templates dialog box, when you scroll down the list of templates you’ll find one called “24 Chapter Outline by Derek Murphy”.
If you’re not ready to start a new project, click the cancel button. Later, when you want to create a new project, select File=>New Project… from Scrivener’s menu and this template will still be there.
To create a new project from this template, select it then click the “Choose…” button.
Scrivener will ask you to name your new project. Once that’s done, you’ll have a new project you can tinker with to your heart’s content.
How my template differs from Derek’s original
What follows is a list of changes and additions I made to the template. As I said earlier, there is nothing wrong with Derek’s original template so please use that if you prefer. All I’ve done is make it fit the way I like to work.
- I moved the “One Page Novel Outline | 25 Chapters | Derek” and “CheatSheet” documents out of the Drafts folder. These are now at the top of the binder and won’t be included in the final document when you compile.
- I changed the icons on the Act I, Act IIa, Act IIb and Act III folders and unticked the “Include in Compile” checkbox.
These folders won’t appear in your compiled file (epub, docx or whatever). If you do want them to appear then tick the “Include in Compile” checkbox in the inspector. - I changed the chapter documents into folders and created a scene document in each chapter folder. Rather than type a whole chapter into one long document, I like to break my chapters into scenes with a separator between scenes. Different authors favour different scene separators, e.g. an empty line, three (or more) asterisks or a graphic.
- I unticked the “Include in Compile” checkbox on Derek’s explanatory documents (i.e. the ones whose names start and end with asterisks – e.g. * Ordinary World *). This means you can leave these documents where they are and they won’t appear in your compiled document (epub, pdf, docx etc).
- I added Prologue and Epilogue documents in the appropriate places, just in case your book has them. If you don’t require these then move them to the Trash folder.
- I added Front matter and Back matter folders. The Front Matter folder contain a dummy cover image and a title page. You should replace the cover image with your book cover image and edit the Title page to suit yourself. The Back Matter folder contains Derek’s original “Author’s Note” and “About the Author” documents. I added “Did you enjoy this book?” (to ask readers to leave a review) and “Copyright” documents. You need to edit all of these to suit your requirements.
Note: The Copyright document has placeholders which will be replaced by actual words in your compiled document. e.g. <$projecttitle> will be replaced by the title of your book. Scrivener gets this from the metadata section of the compile dialog box (click the second icon at the top of the right-hand column of the compile dialog to view or edit the metadata). - I added a Template Sheets folder. This contains a “Character Sheet” which I put together from Derek’s slides and video. (Any mistakes or exclusions in the Character Sheet are mine).
To use the Character Sheet template for your own characters, right-click the Characters folder in the Research folder and select Add=>New from Template=>Character Sheet.
- I added a Section dividers etc folder which contains an example image you can use to separate scenes when you compile. If you choose to use the ebook3-with-extra-formatting.scrformat file (see the download button at the beginning of this page) it will use the “section-divider” image in this folder to separate the scenes.
You can replace this image with your own (make sure you rename your image to “section-divider” once you’ve dragged it into the Section dividers etc folder, or edit the “Scene” section layout in the compile dialog and change name in the “separator between sections” field). - I also added my own “Section type”, “Label” and “Status” stuff. You can modify these to suit yourself.
Note: the ebook3-with-extra-formatting.scrformat file (see the download button at the beginning of this page) uses the Section Types in this template. If you add or delete any Section Types then you’ll have to assign section layouts in the compile dialog. - Lastly, I changed the icons on Derek’s Act folders and the explanatory documents to make them stand out. This gives a visual indicator about which documents should not be included in the compile. It should help with navigating the project.

That’s it for the template. You don’t have to use it as is, of course. Change it so that it works for your style of writing.
How to import and use the epub3 format file
When I started using Scrivener the biggest headache was compiling. Over the years I’ve learned how it works and I can now compile epub, mobi, PDF, and Word files relatively easily. If you struggle with compiling, the ebook format file I’ve included in the download (i.e. ebook3-with-extra-formatting.scrformat) can help. What follows are brief instructions for importing and using the format file.
To import a format you have to open the compile dialog:
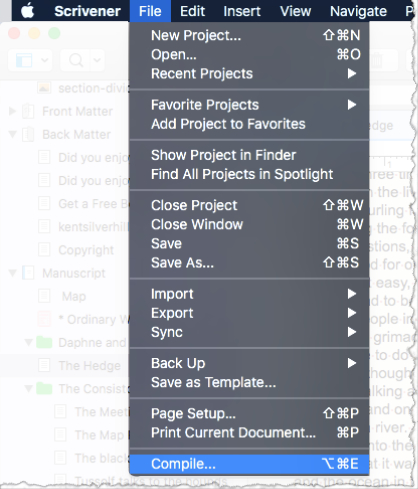
Select File=>Compile (or click the “compile” button on the menu bar)
Click the little cog icon at the bottom left of the compile dialog and select “Import Formats”. Navigate to where you saved the ebook3-with-extra-formatting.scrformat file and click the “Open” button.
When Scrivener asks “Where would you like to import the selected formats?”, choose My Formats.
If you choose “Project Formats” you’ll only be able to use the format in the project that’s currently open in Scrivener. Choosing “My formats” means you’ll be able to use the format in any project, even ones you’ve created previously.
To use the format, select “ePub 3 Ebook (.epub)” at the top of the compile dialog, then select “Ebook3 01” under My Formats in the Formats column. (If you want, you can rename this by right-clicking “Ebook3 01” and selecting “Edit format…”)
If you use this format on a project you have created using the 24 Chapter Outline by Derek Murphy template (from the download at the top of this page), then all the Section Layouts in the middle column of the compile should be correctly assigned. All you need to do is move your mouse over to the third column and edit the metadata by clicking the little “tag” icon (second icon from the left).
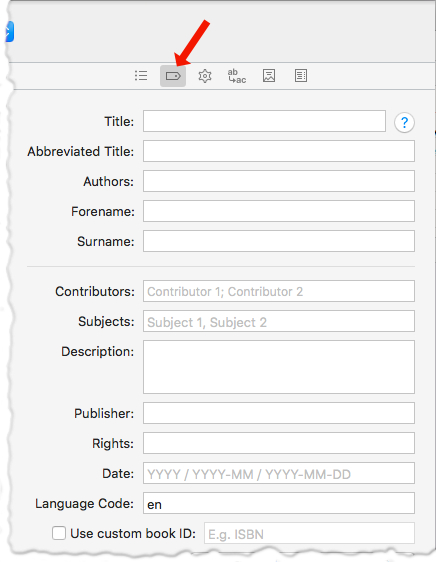
It’s important to enter data in at least the top section (title and authors) but you should add as much data as you can. The metadata is stored in epub files and is used by epub readers and other systems to catalogue and organise books in a sensible way.
As an example of how the metadata can be used in your project, if you created the project from the above template then then the copyright document in the project has placeholders (<$projecttitle> for example) which will automatically be filled in with the corresponding metadata when you compile.
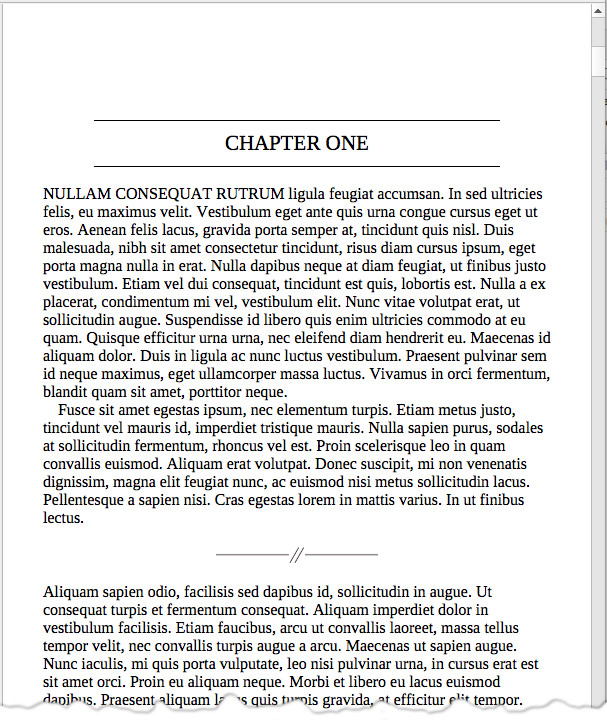
Example of how your epub3 will look
Once you click the “compile” the epub Scrivener produces will be formatted similar to the one below:
What extras are added by the ebook3-with-extra-formatting.scrformat format file?
- The section layouts are already assigned which removes the pain of you having to do so. Feel free, of course, if you want to change or edit any of them.
- At the top of the page, the chapter number (which is the “Chapter Heading” section layout in the Scrivener project), has a line above and below it.
- The scenes are separated by a graphic. This graphic is the image called “section-divider” in the “Section dividers etc” folder.
You can replace this graphic with your own. All you have to do is delete the existing “section-divider” image, then drag a suitable image from your Mac or PC into the “Section dividers etc” folder, and rename your new image “section-divider” in the binder.
If you don’t want an image between scenes then just delete “section-divider” from the “Section dividers etc” folder. When you compile, Scrivener will just put a blank line between the scenes.
I hope you find this format file useful. I know a lot of writers find it difficult to create good-looking epubs and print books using Scrivener’s compile feature, and many turn to other apps like Vellum or Atticus to do this. However, not everybody can afford to purchase another product just to format their books.
I’m not going to pretend Scrivener’s compile feature is easy to use, but if you persevere, it’s capable of producing epubs and other formats that you can be proud of.
There are examples on Literature and Latte’s website, and other sites, about how to get more creative with compiling, like using images for chapter headings for example. Stick with it. It gets easier to do this sort of thing once you get your head around the process.

The epub3 format file by Kent Silverhill is licensed under a Creative Commons Attribution-ShareAlike 4.0 International License.
This means you can use the ebook3-with-extra-formatting.scrformat file for formatting your own books as much as you like. You can also remix, adapt, and build upon it and give it to others as long as you license your new creation under the identical terms.
Leave a Reply